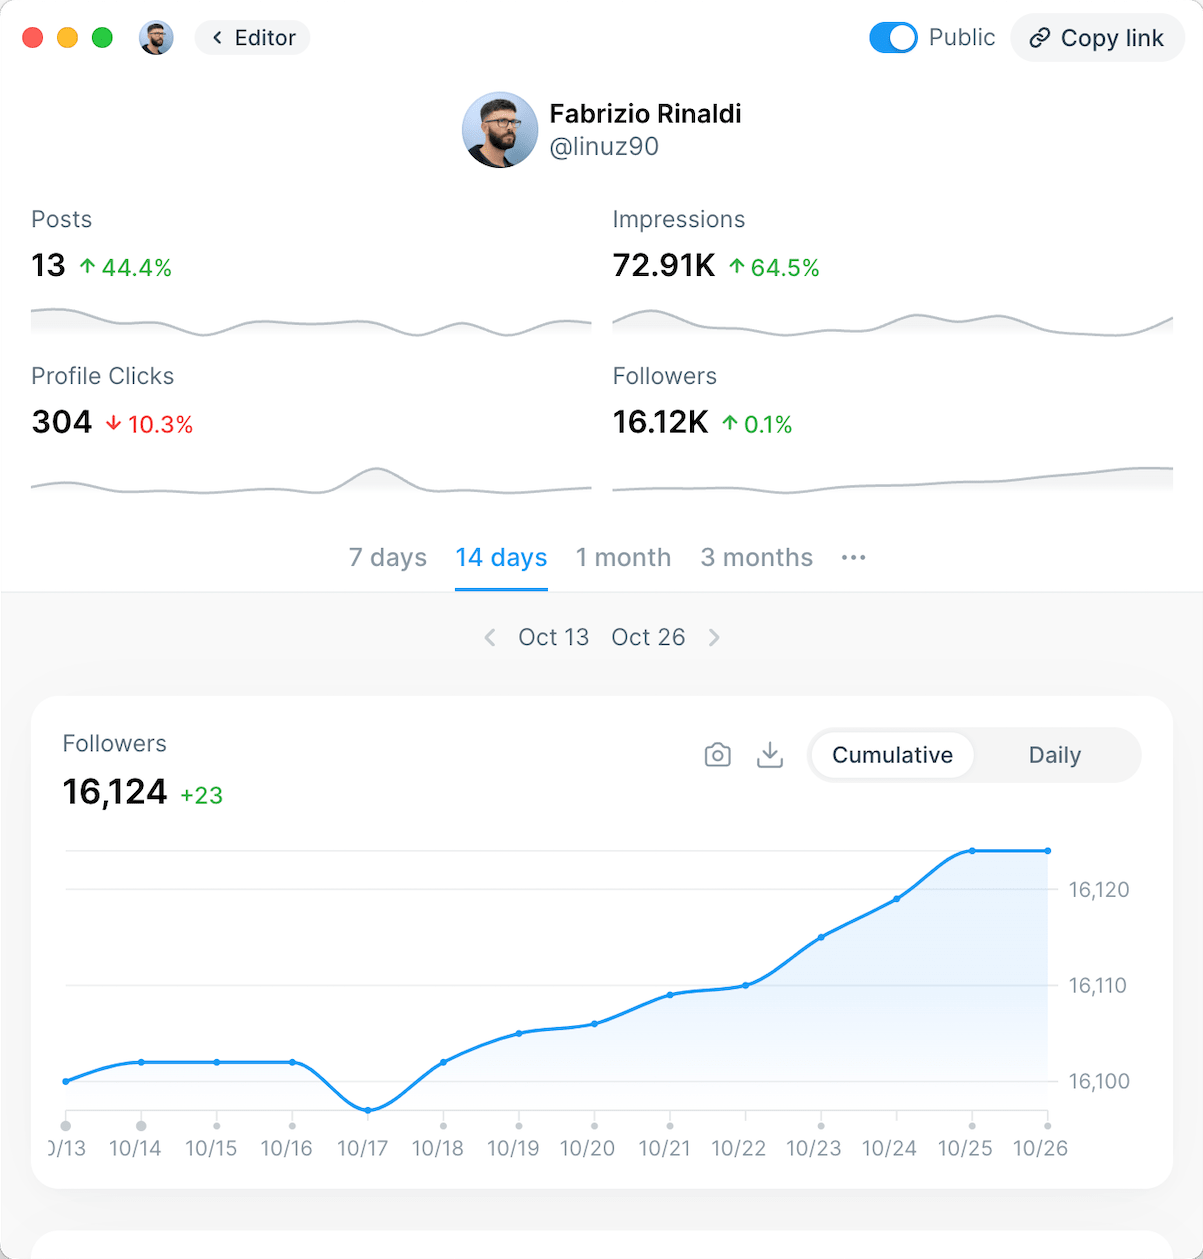
More and more teams and creators ask AI agents "which posts worked this week?" before they open a dashboard. For a useful answer, the agent needs your real X analytics, not a screenshot you pasted in last Monday. This guide shows how to pull those numbers straight from the X API and hand them to Claude, ChatGPT, Cursor, or any other agent.
The X API is pay-per-use now. There's no monthly tier: you buy credits, and reading your own posts' metrics costs a few dollars a month per account. You'll need an X account and a payment method.
Not a terminal person? A coding agent on your computer, like Claude Code or OpenAI's Codex, can run almost every command in this guide for you, and both work from a desktop app. Look for the Agent shortcut in each step to see what you can hand off. The only parts you do by hand are the X Developer Console and a one-time login.
What you'll do:
- Create an X developer account, an app, and add credits
- Install xurl, X's official command-line tool, and log in
- Pull your posts with metrics
- Feed them to your AI agent
- Automate it and build your own history
What you get (and what you don't)
The X API returns two kinds of post metrics:
| Metric type | What's in it | Who can see it |
|---|---|---|
| Public metrics | Impressions, likes, reposts, replies, quotes, bookmarks | Anyone, for any public post |
| Non-public and organic metrics | Engagements, URL clicks, profile clicks, plus organic vs. promoted splits and video playback quartiles | Only the post's author, logged in. Only for posts from the last 30 days |
X also has a dedicated analytics endpoint with hourly and daily breakdowns, but it's Enterprise-only. On pay-per-use it returns a client-not-enrolled error. Step 5 shows a cheap way to build your own daily history instead.
What it costs
X bills per post returned, out of prepaid credits. The rates that matter here, from X's pricing page:
- Owned Reads: $0.001 per post when you read your own posts and the account you're logged in as also owns the developer app.
- Posts: Read: $0.005 per post for everything else, including other accounts authorized on your app.
- Daily dedupe: a post fetched more than once in a UTC day is only charged once. Running your report three times on Monday costs the same as once.
- Spending limits and auto-recharge live in the Developer Console, so a buggy script can't drain your card.
Example: an account publishing 5 posts a day has about 150 posts in a 30-day window. Refreshing all of them daily costs 150 × $0.001 = $0.15 a day, roughly $4.50 a month with Owned Reads, or about $22.50 a month at the standard rate.
Running several brand accounts? Owned Read pricing needs each brand to own its own developer app, which means a separate developer account, credits, and payment method per brand. One app can authorize all of them instead, at the standard rate:
| Six accounts, 150 posts each, refreshed daily | Per month |
|---|---|
| One developer app authorizing all six (standard reads) | about $135 |
| Six developer accounts, one per brand (Owned Reads) | about $27 |
Step 1: Developer account, app, and credits
Do this step yourself. It's a few browser forms, X's Developer Agreement, and a payment method, so it's not one to hand to an agent. If a screen doesn't match the screenshots below, take a screenshot (with your keys hidden) and ask Claude or ChatGPT what to click.
1. Sign up. Go to console.x.com and sign in with the X account whose analytics you want. Accept the Developer Agreement and describe your use in a sentence, like "Internal analytics and reporting for our own account".
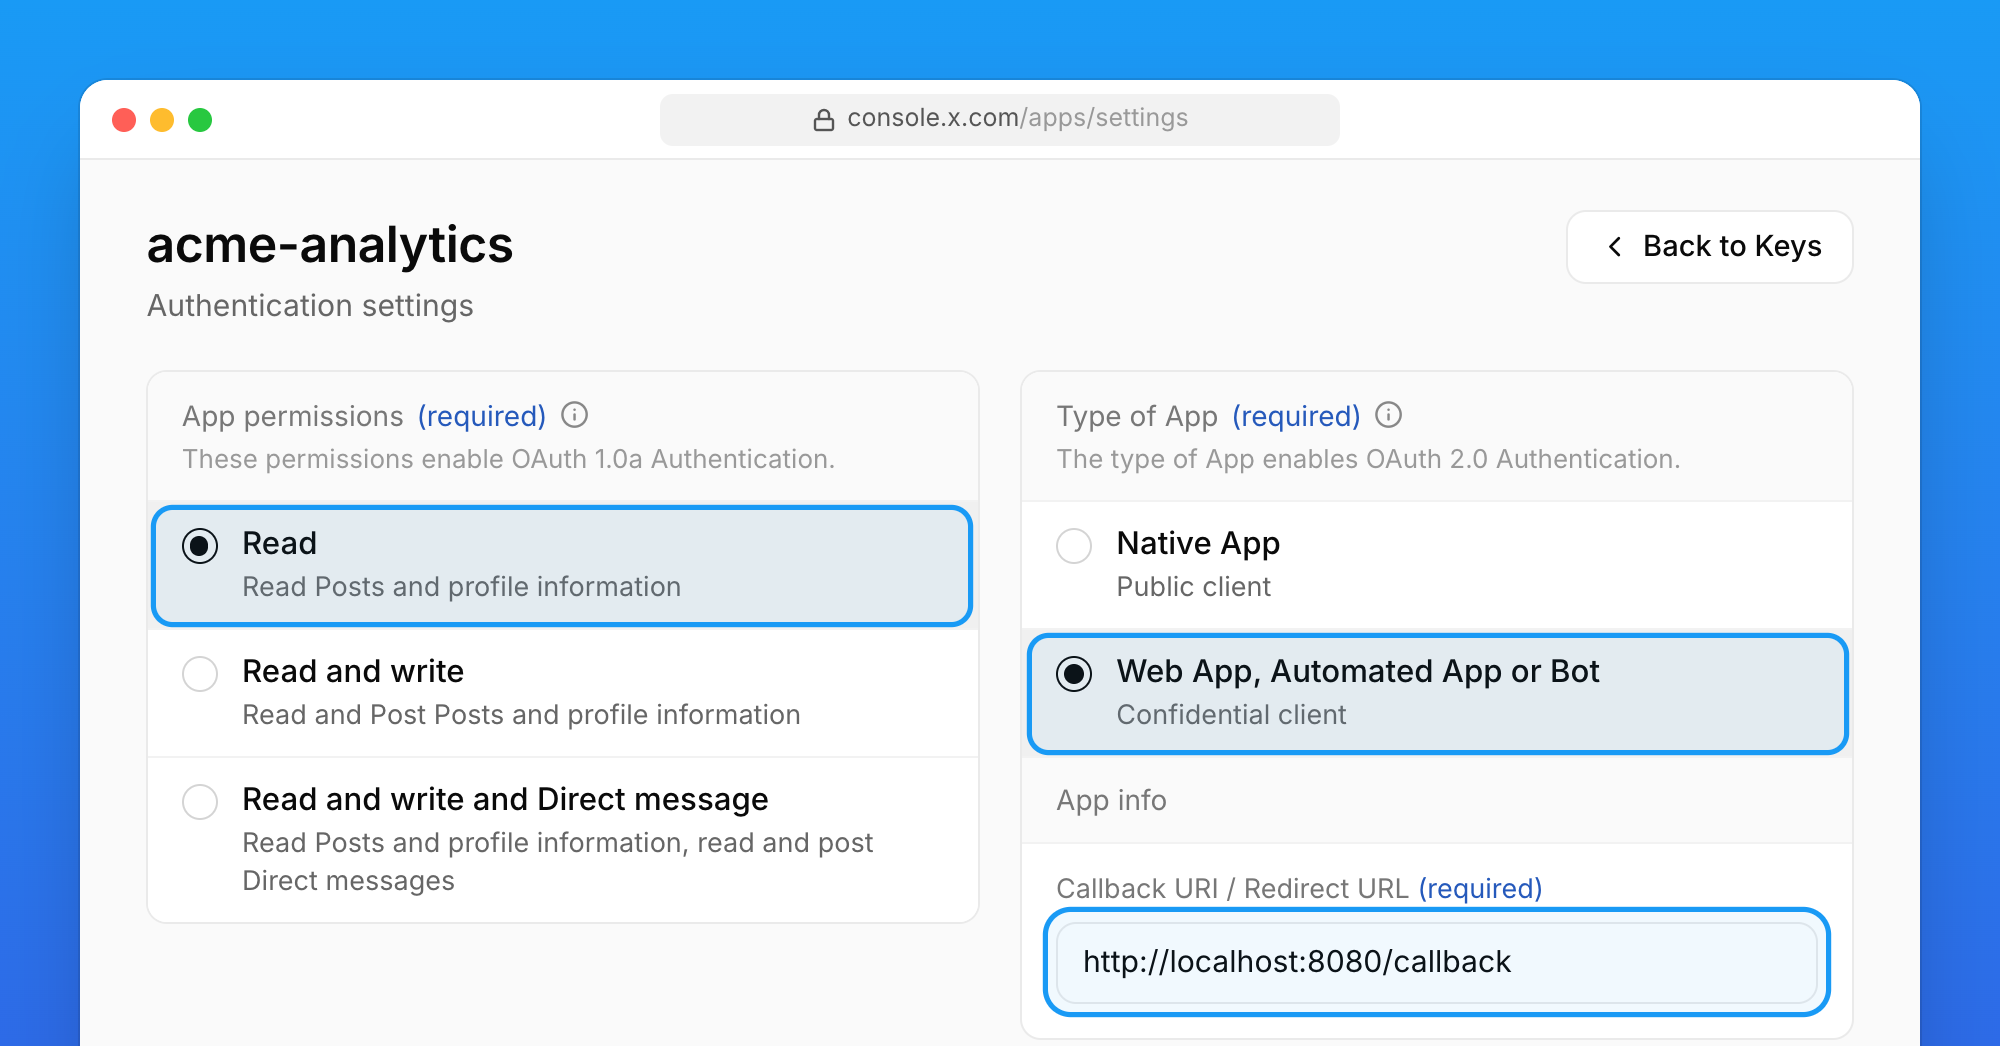
2. Create the app. Click New App, name it (for example acme-analytics), then open its User authentication settings and enable OAuth 2.0. App permissions: Read. Type of App: Web App, Automated App or Bot. Callback URI: http://localhost:8080/callback (xurl's default). Website URL: your site.
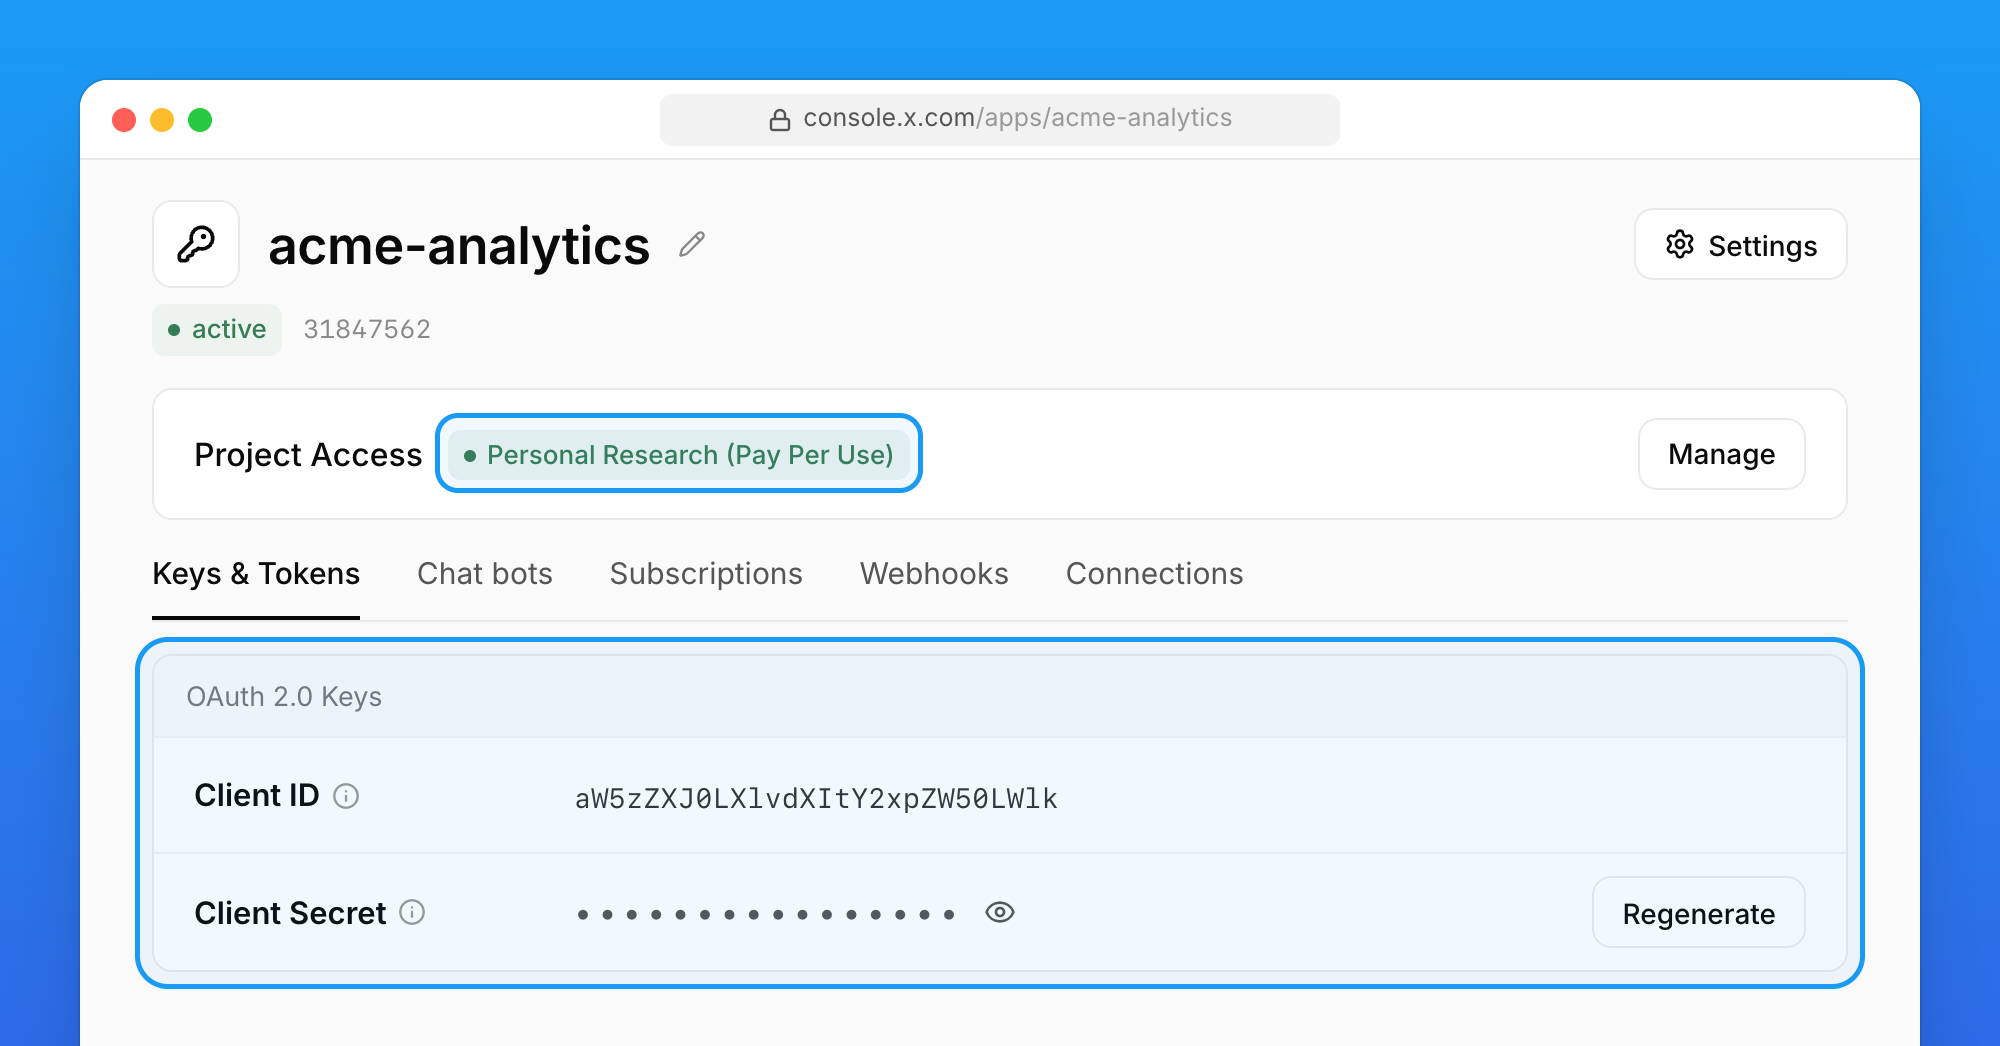
3. Copy your keys. Save, open the app's Keys & Tokens tab, and copy the OAuth 2.0 Client ID and Client Secret.
4. Add credits. On the console dashboard, click Buy Credits, add a payment method, and buy a small pack. A few dollars is plenty to start. Then set a spending limit in the Billing section. Optional: turn on auto-recharge so a scheduled report doesn't fail mid-month.
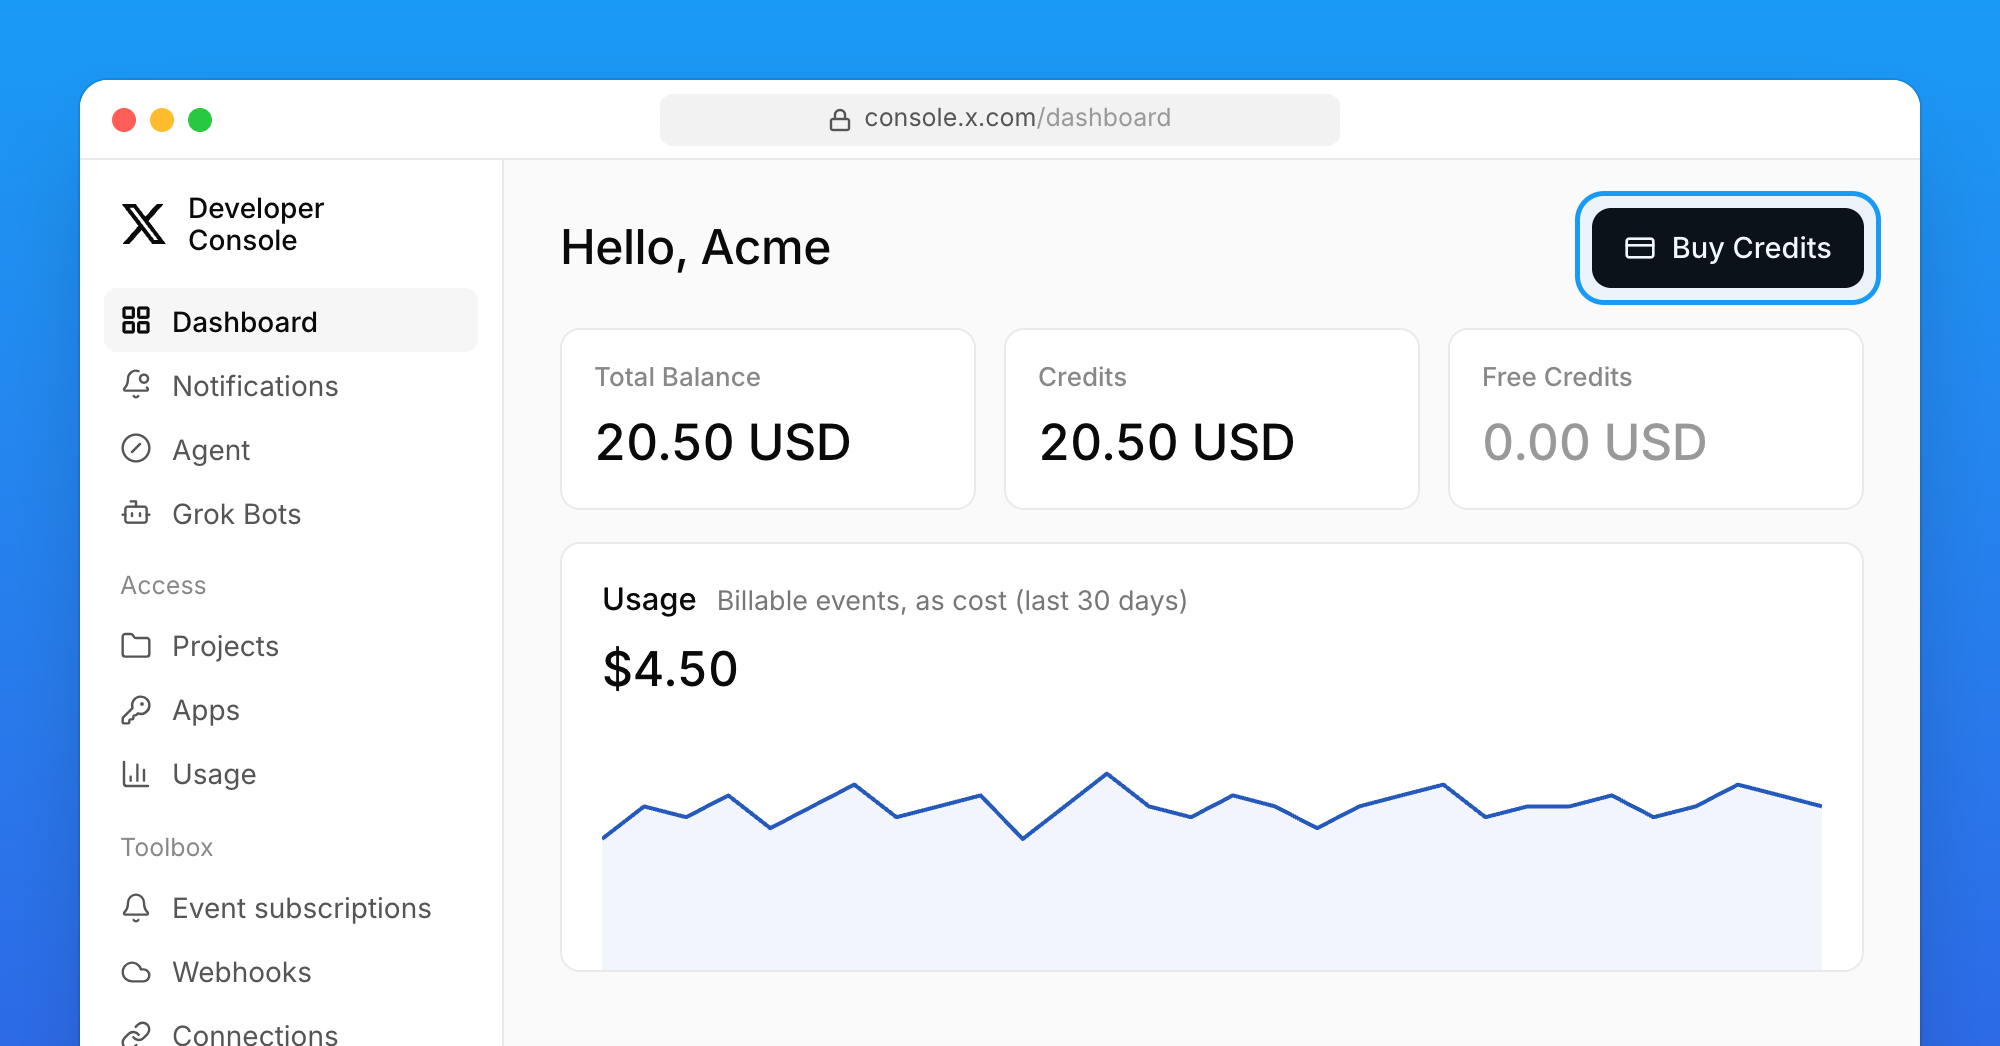
5. Check the package. Make sure the app's Project Access says Pay Per Use, as in the keys screenshot above. If it doesn't, use Manage next to it to move the app to the Pay-per-use package. Without this, requests fail with client-not-enrolled even after a successful login.
Keep your keys safe. Credentials are shown once. Put them straight into a password manager. Regenerating invalidates the old ones. Don't commit them to git or paste them into shared docs.
Step 2: Install xurl and log in
xurl is X's official command-line tool. Think of it as curl that handles the OAuth for you: it opens the login, stores your tokens in ~/.xurl, and refreshes them automatically.
Agent shortcut: ask your agent to install it:
Install xurl, X's official command-line tool, on this computer and check that it runs.
Or install it yourself:
# macOS (Homebrew)
brew install --cask xdevplatform/tap/xurl

# or with npm
npm install -g @xdevplatform/xurl
Then log in. Do this part yourself, in your own terminal (the Terminal app on a Mac), so your Client Secret stays out of chat transcripts. Exporting your keys as environment variables also keeps them out of your shell history:
export CLIENT_ID="your-client-id"
export CLIENT_SECRET="your-client-secret"

xurl auth oauth2
A browser window opens. Approve the app, then check that it worked:
xurl auth status
xurl whoami
xurl saves your keys and login in ~/.xurl, so from here on any agent on this computer can use it without you sharing your keys again.
On a server with no browser? Run xurl auth oauth2 --headless. It prints a login URL you can open on any device, then asks you to paste the redirect URL back in.
Step 3: Pull your posts with metrics
Agent shortcut: if you're using a coding agent, skip to Step 4. It makes these calls for you, including the ID lookup and paging through results. The commands below show what it runs under the hood.
Get your numeric user ID:
xurl /2/users/meCopy the id from the response, then fetch your recent posts with every metric you're allowed to see:
xurl "/2/users/YOUR_USER_ID/tweets?max_results=100&exclude=retweets,replies&start_time=2026-09-01T00:00:00Z&tweet.fields=created_at,public_metrics,non_public_metrics,organic_metrics"Each post comes back like this (trimmed):
{
  "id": "2105344373059633183",
  "created_at": "2026-09-30T17:09:48.000Z",
  "public_metrics": { "impression_count": 1842, "like_count": 8, "reply_count": 2, "retweet_count": 0, "quote_count": 0, "bookmark_count": 1 },
  "non_public_metrics": { "impression_count": 1841, "engagements": 19, "user_profile_clicks": 4 },
  "organic_metrics": { "impression_count": 1841, "like_count": 8, "reply_count": 2, "retweet_count": 0, "user_profile_clicks": 4 }
}
A few things to know:
max_resultsgoes up to 100. When there are more posts, the response includesmeta.next_token. Pass it back as&pagination_token=...to get the next page.- Non-public and organic metrics only exist for posts from the last 30 days. For older posts, request
public_metricsonly. url_link_clicksis simply missing on posts without a link, so scripts should default it to 0.- Drop
exclude=repliesif replies are part of your strategy.
Step 4: Feed your X analytics to your AI agent
Pick the route that matches how you already work.
Option A: Let a terminal agent run xurl
Agents that can run shell commands, like Claude Code, Codex, or OpenClaw, don't need anything else. Once xurl is logged in, they can call any endpoint in this guide with your account's permissions. Teach your agent xurl with one command, or ask it to run this for you:
npx skills add https://github.com/xdevplatform/xurlThen ask in plain language:
Use xurl to get my posts from the last 30 days with public, non-public, and organic metrics. Summarize what the top 10 by impressions have in common.
For deeper API questions, point it at X's agent docs: docs.x.com/skill.md and docs.x.com/llms.txt.
Keep the app read-only. An agent with xurl access can do anything your app's permissions allow. Leave the app on Read so the agent can't post, like, or follow on your behalf.
Option B: Connect X's MCP server (Claude Desktop, Cursor, VS Code)
X runs a hosted MCP server at https://api.x.com/mcp, and xurl acts as the local bridge that handles the login. Add this to your MCP client config (claude_desktop_config.json, or ~/.cursor/mcp.json in Cursor):
{
  "mcpServers": {
    "xapi": {
      "command": "npx",
      "args": ["-y", "@xdevplatform/xurl", "mcp", "https://api.x.com/mcp"],
      "env": { "CLIENT_ID": "YOUR_CLIENT_ID", "CLIENT_SECRET": "YOUR_CLIENT_SECRET" },
      "startup_timeout_sec": 300
    }
  }
}
Agent shortcut: paste the snippet into Claude Code or Codex and ask it to add the server to your MCP client's config. Leave the placeholders in and fill in your keys yourself.
The first run opens a browser so you can log in. Restart your client and the X tools show up.
The catch: X's MCP tools return public metrics only. Asking for non-public or organic metrics is silently ignored, and there's no analytics tool. It's fine for "which posts got the most impressions this week?", but for clicks, engagements, or a proper report use Option A or C.
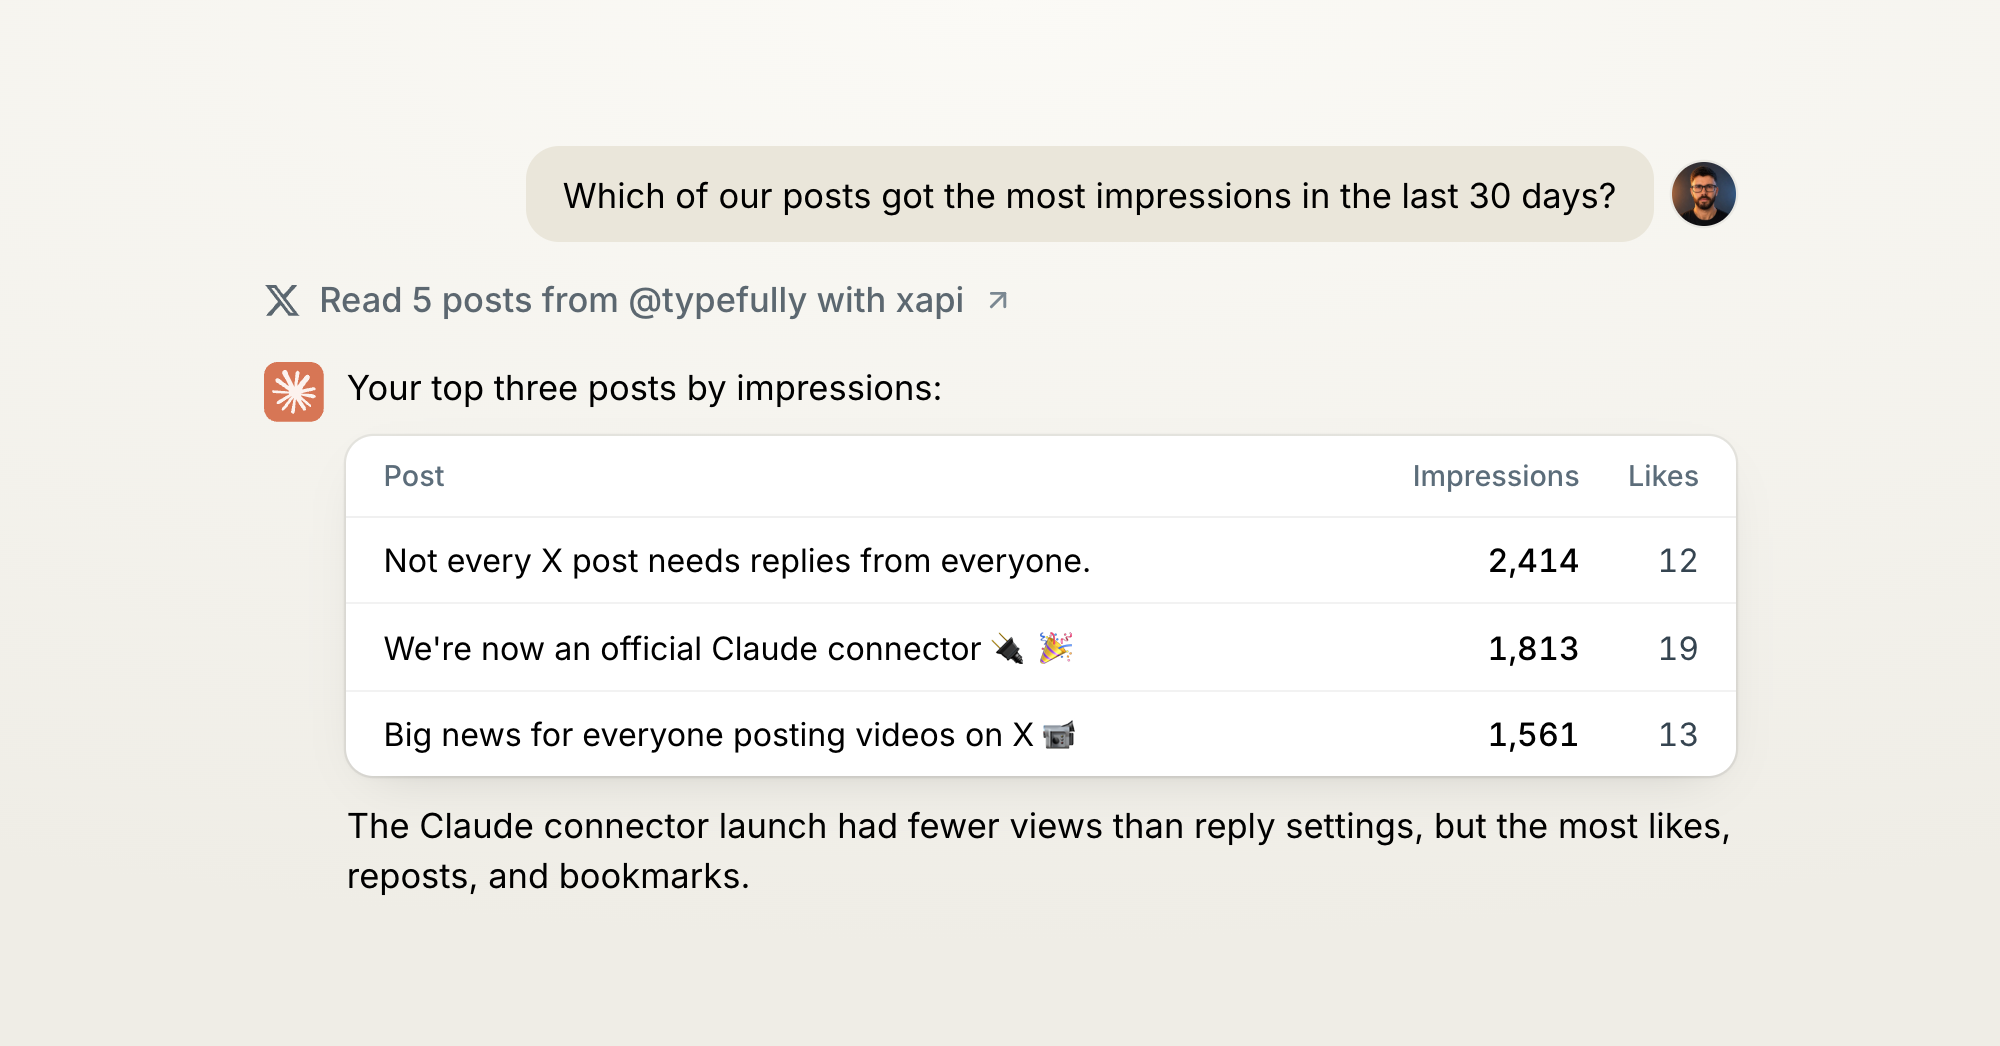
Option C: Hand your agent a file
No setup on the agent side: export your posts to CSV (Step 5) and upload the file to ChatGPT, Claude, or any assistant. Works everywhere, but the data is only as fresh as your last export.
Prompts worth trying
- "Which three posts from the last 7 days overperformed on impressions, and why do you think they did?"
- "Compare this week's average impressions and engagements per post with last week's."
- "Which posts drove the most profile clicks? Draft three new post ideas in the same vein."
- "Write three posts in the style of my top performers and save them as drafts in Typefully." This one needs Typefully connected to your agent, more on that below.
Let your AI agent draft and schedule your next posts with Typefully.
Try for free nowStep 5: Automate it and build your own history
Agent shortcut: this whole step is a good job for a coding agent. Try:
Write a script that uses xurl to export my X posts from the last 30 days, with every metric I can see, to a dated CSV file. Schedule it to run every morning at 7, and show me how to check that it ran.
Export to CSV. With jq installed, one command turns your posts into a spreadsheet, including the private metrics:
xurl "/2/users/YOUR_USER_ID/tweets?max_results=100&exclude=retweets,replies&tweet.fields=created_at,public_metrics,non_public_metrics" \
| jq -r '["id","created_at","impressions","likes","replies","reposts","bookmarks","engagements","url_clicks","profile_clicks"],
  (.data[] | [.id, .created_at,
    .public_metrics.impression_count, .public_metrics.like_count, .public_metrics.reply_count,
    .public_metrics.retweet_count, .public_metrics.bookmark_count,
    (.non_public_metrics.engagements // 0), (.non_public_metrics.url_link_clicks // 0),
    (.non_public_metrics.user_profile_clicks // 0)]) | @csv' > "x-posts-$(date +%F).csv"
Import the file into Google Sheets, Looker Studio, or whatever your team already uses.
Build your own time series. Run that export once a day and keep every file. Today's numbers minus yesterday's give you per-post daily growth, which is what the Enterprise analytics endpoint would have given you. Thanks to daily dedupe, each post is charged once a day no matter how many times the script runs.
# every day at 07:00
0 7 * * * /path/to/x-report.sh
Use it from your own code. xurl token prints a fresh access token, refreshing it if needed, so a Python script or an internal dashboard can call the API directly:
TOKEN=$(xurl token)
curl -H "Authorization: Bearer $TOKEN" "https://api.x.com/2/users/me"
Track your usage. The usage endpoint needs app-only auth and returns post-read counts against your monthly cap, not dollars. Spend in dollars is in the Developer Console.
xurl --auth app /2/usage/tweetsMultiple accounts
xurl can hold several logged-in accounts per app. Authorize each one, signing into the matching X account in the browser:
xurl auth oauth2 brandone
xurl auth oauth2 brandtwo
Then choose the account per request:
xurl --username brandone /2/users/meAgent shortcut: your agent can add accounts too. Ask it to log in another X account with xurl, then sign into that account when the browser opens.
You can also register separate apps with xurl auth apps add and switch with --app. Owned Read pricing (see "What it costs") is the usual reason to give each brand its own app.
Troubleshooting
Agent shortcut: paste the error into your coding agent and ask what's wrong. It can run xurl auth status, check which app and account are active, and try the request again. The usual causes:
client-forbiddenorclient-not-enrolledafter a successful login: in the console, open your app and check that Project Access says Pay Per Use. If not, use Manage to move it to the Pay-per-use package. If it only happens on/2/tweets/analytics, that endpoint is Enterprise-only.- "Something went wrong. You weren't able to give access to the App" in the browser: xurl started without valid credentials. Re-export
CLIENT_IDandCLIENT_SECRETin the same shell and check thathttp://localhost:8080/callbackis registered on the app. - 401 or 403 on requests: usually the wrong app or account, or missing scopes. Run
xurl auth status. - Non-public metrics missing: the post is older than 30 days, or you're not logged in as its author.
- Requests failing out of nowhere: check your credit balance and spending limit. Requests stop at zero or at the limit.
Turn insights into your next post
Analytics tell your agent what worked. The next step is writing more of it, and that's where Typefully comes in.
Connect Typefully to your AI agent (Claude, ChatGPT, Cursor, Codex, OpenClaw, and more), and the same agent that just read your numbers can draft the next post in your voice. It can work through your team's comments on the draft, then schedule it across X, LinkedIn, Threads, Bluesky, and Mastodon, or leave it for you to polish in Typefully's editor first.
Prefer a dashboard to a terminal? Typefully's built-in analytics show your followers, impressions, and engagement rate in one place. You can also sort past posts by any metric to find your best performers, with no API keys or credits to manage.
Draft, schedule, and publish your next posts with Typefully, or let your AI agent do it.
Try Typefully freeJoin 10,000+ customers












Discover
Join 10,000+ customers to grow on 𝕏, LinkedIn, Bluesky and Threads.
Level up your content with AI and boost engagement 🚀
Join 10,000+ customers