One of my favorite design tactics is creating "Switchboards" in Figma.
It's a waaaayy more efficient way of prototyping.
Here's how they work 👇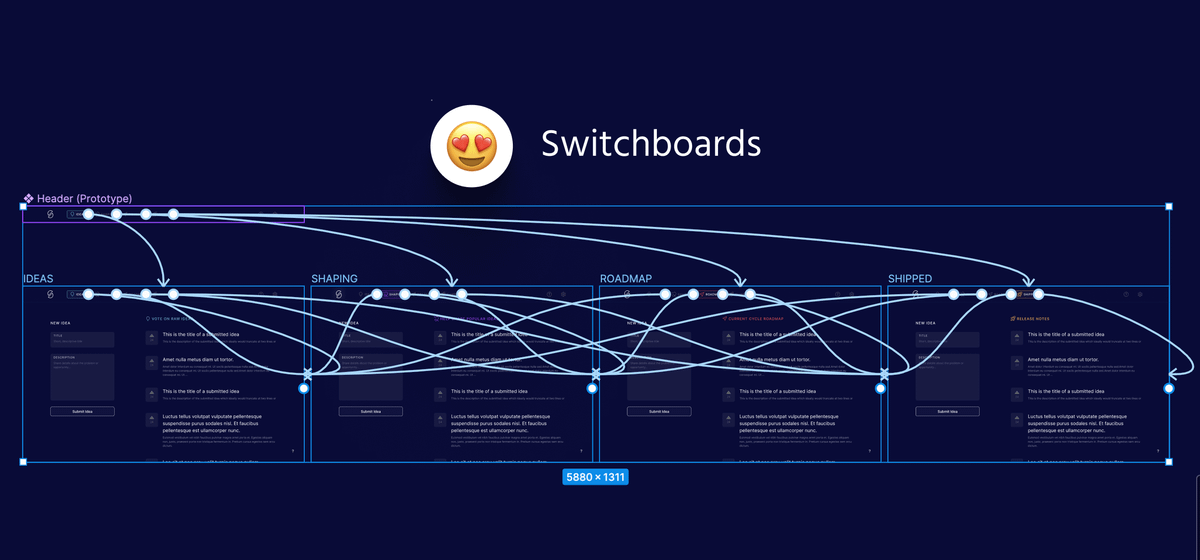
When it comes to prototyping...
It's important that we're not wasting time making the same tedious connections over and over again.
Now you might think that I'm going to tell you that you shouldn't have this many noodles in your prototypes...
But actually, that's not true 👇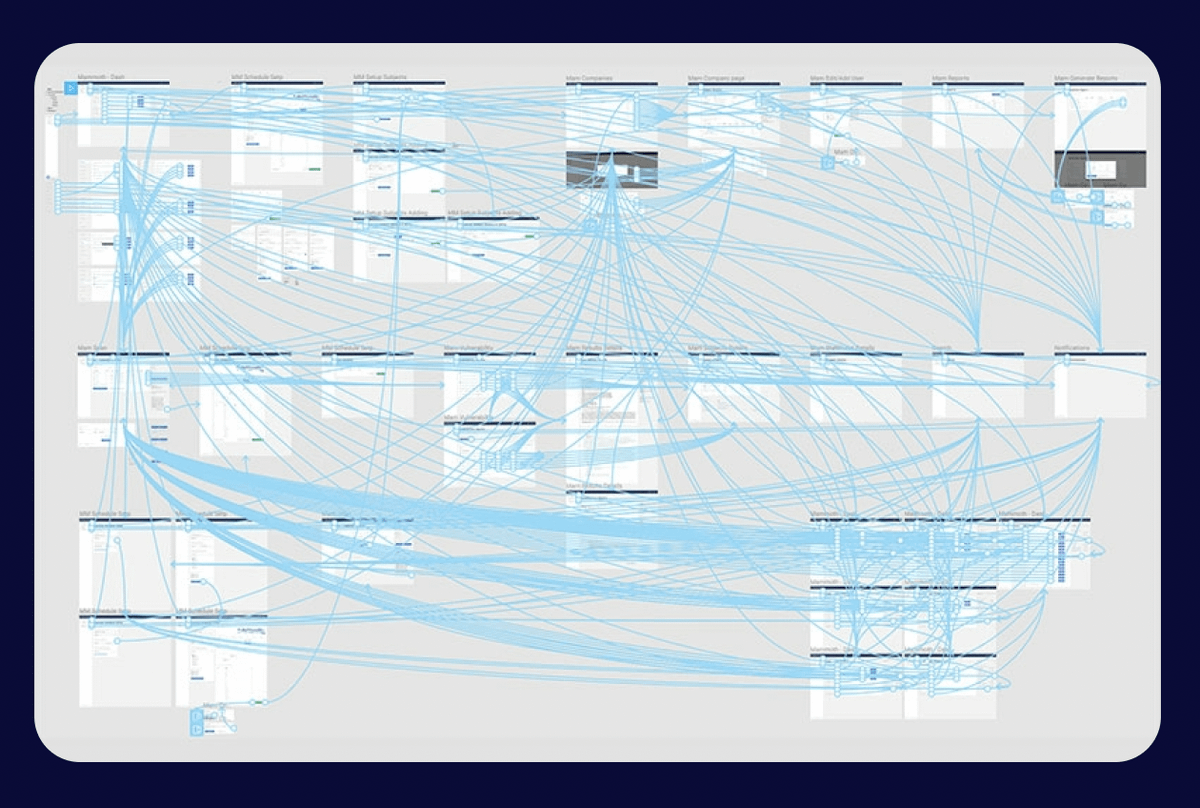
Instead of the number of connection lines in our prototype...
The thing that is important is WHERE those lines are originating from 💡
A giant bowl of spaghetti lines isn't a bad thing as long as we're actively minimizing our sources of truth so we can make changes easily...
Because let's be honest, we're never going to get our prototypes 100% correct on the first pass.
Design wouldn't be fun if it were that easy 😇
So here's how you can use "Switchboards" to create prototypes that are easy to update and allow you to iterate more quickly 👇
What is a "Switchboard"?
☞ Switchboards are main components that have been pulled out of a chunk of UI so as to function as a single place to control all of the prototyping connections
In this image, the Switchboard is the component on the left 👀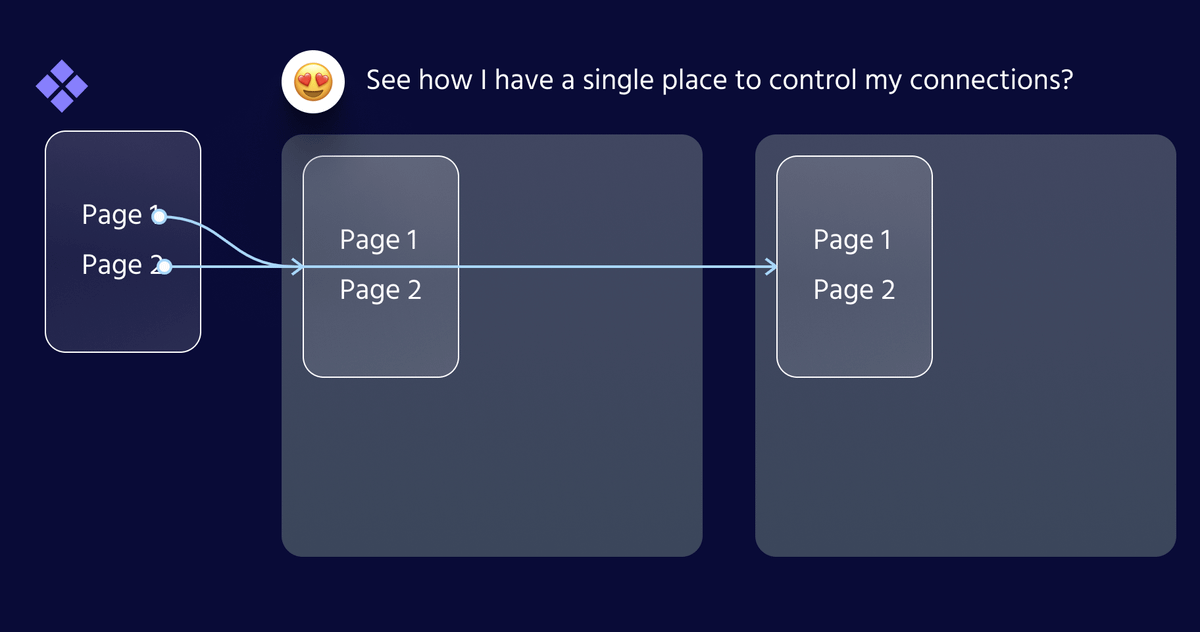
When do you use Switchboards?
They're especially valuable when making connections between pages that all share a common navigational element.
For example: Headers, Sidebars, Tab bars, etc...
The vast majority of pages fall into this category so I use switchboards a lot 😇
Why are they valuable?
☞ Switchboards minimize our sources of truth so we can update our prototypes more quickly
Continuing our example...
If I update my nav element I normally have 3 places to update my prototype.
But if I use a Switchboard, I have a single source of truth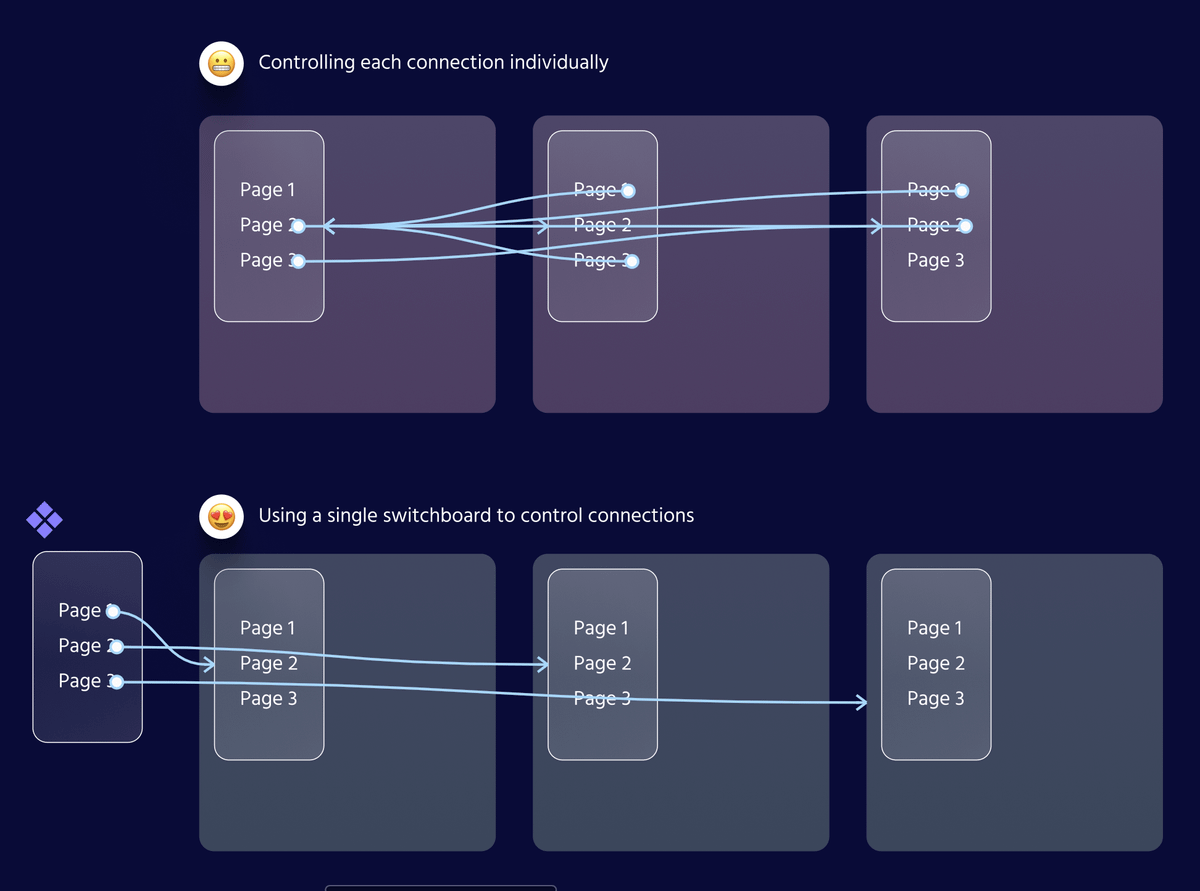
Now, this is obviously a pretty simplistic example.
In more robust prototypes, we might have 10+ instances.
W/o Switchboards ☞ make the same change 10+ times
W/ Switchboards ☞ make each change only once
Let's look at a concrete example 👇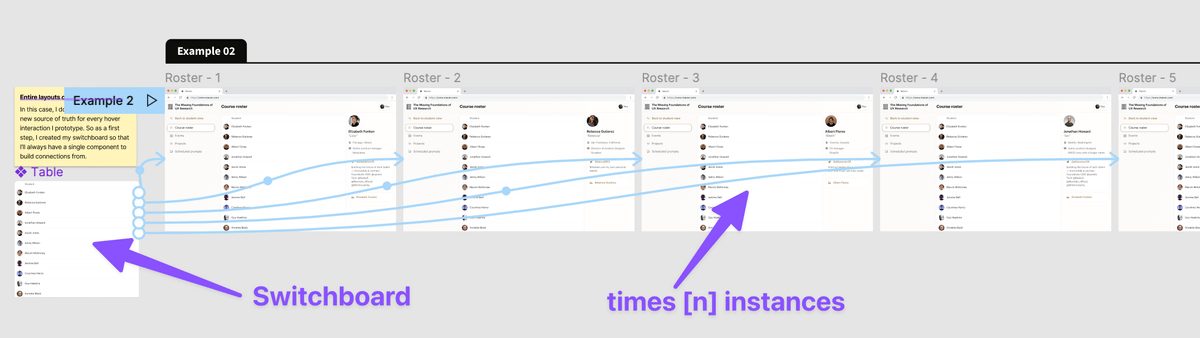
Imagine that I'm prototyping between 4 screens that share a consistent header.
Here's how I would set up my prototype to help me iterate more quickly👇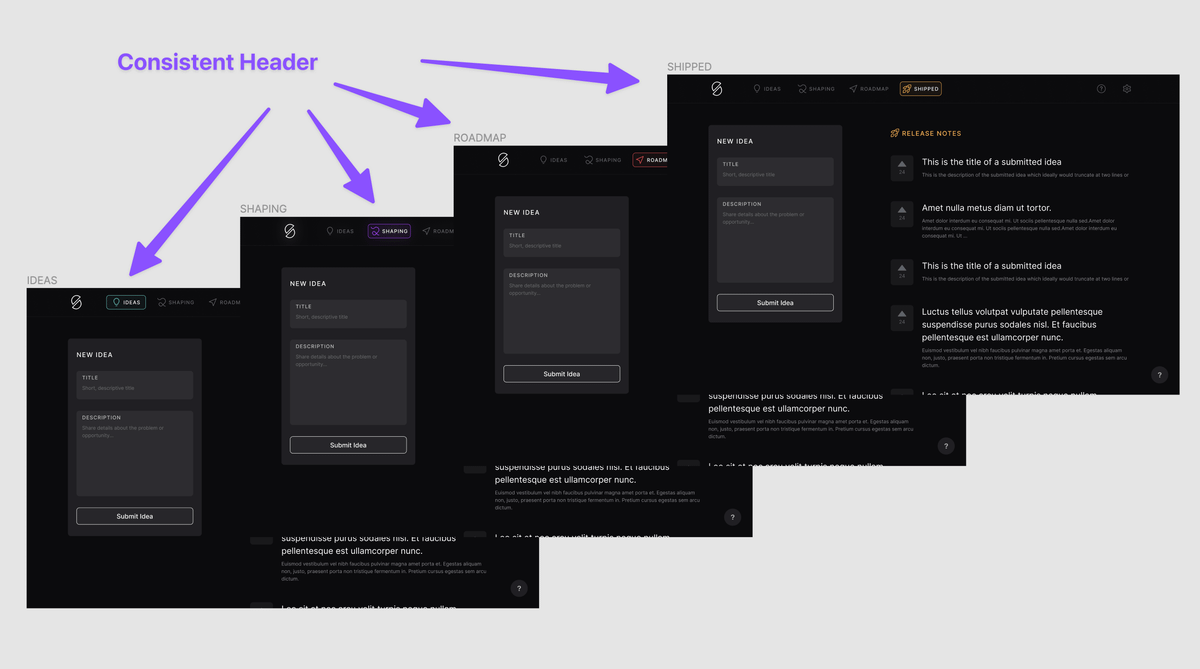
Let's say this `Header` component is being imported from my UI Kit.
I’ll still turn it into a new main component locally before I start using it in my designs.
That way I'm essentially wrapping my `Header` in a single switchboard to control all of my connections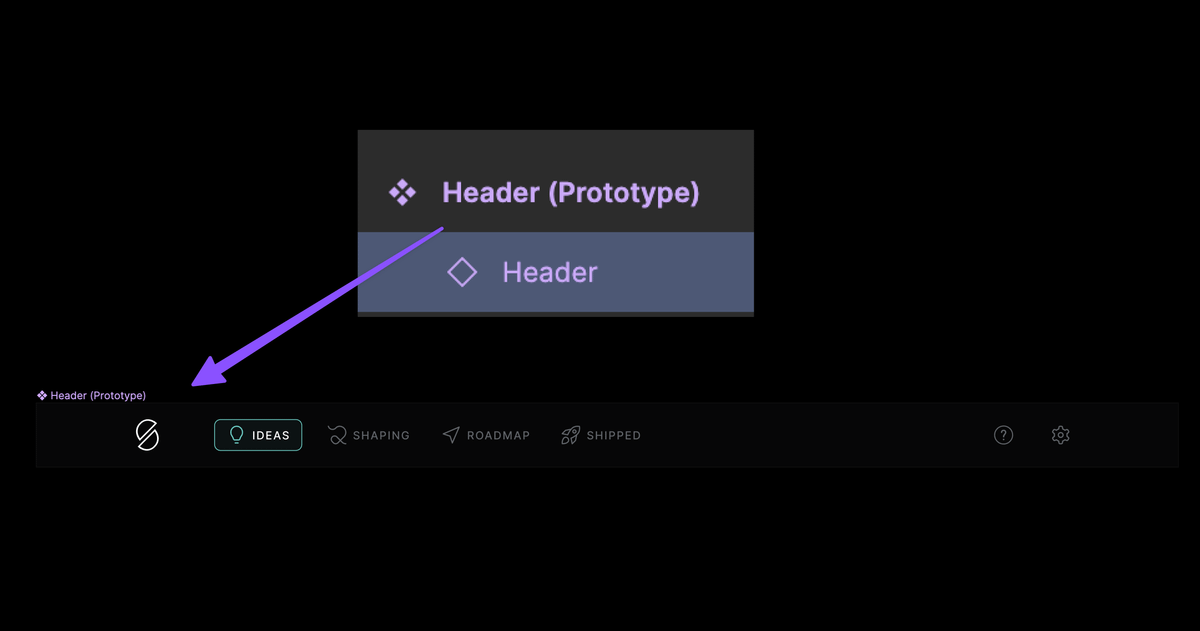
This may look like a big bowl of pasta but it's incredibly simple because everything ties back to my switchboard
This means as I'm iterating I can make changes QUICKLY 💪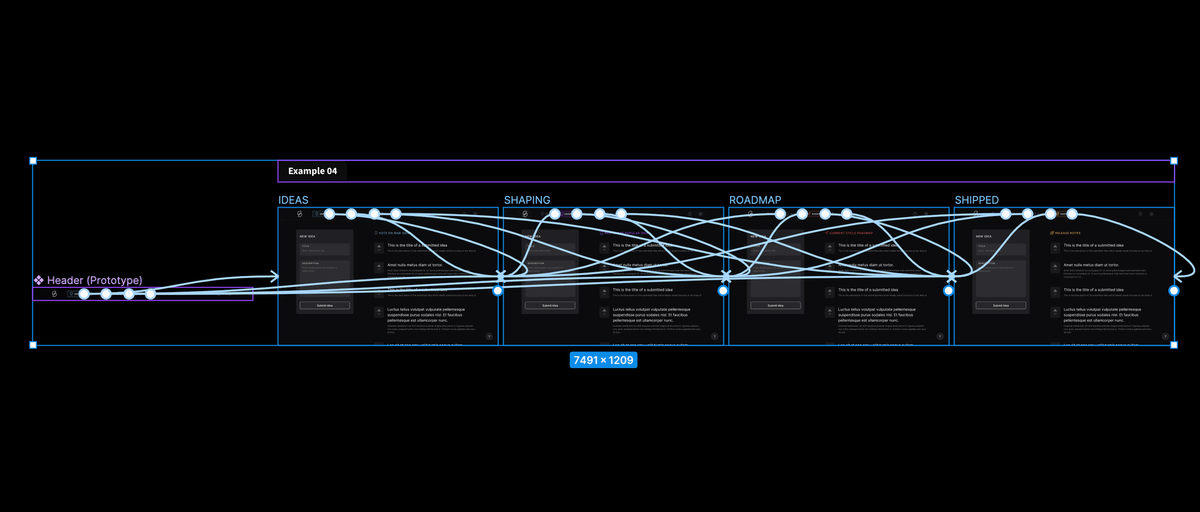
So next time you're setting out to explore a new prototype...
Start by asking yourself: "Is there a switchboard I can start with that'll make things way easier?"
The answer is almost always "Yes" 👍
If you're in the market for more design tactics like this...
1) Make sure you're following me @Ridderingand
2) Sign up to receive the best design tactics each month 👇
getrevue.co/profile/ridd
Lastly if you want to go deeper into prototyping strategies...
I think you'll enjoy this thread 👇
twitter.com/Ridderingand/status/1485456312192278528?s=20&t=sXdmaDvB0Yt7eZtXkwKr9Q

Ridd 🤿
@ridd_design
Teaching 5,000+ advanced Figma ☞ figma.academy Learning from top designers ☞ dive.club Founding designer ☞ maven.com