If you're like me, you were a bit overwhelmed the first time you started prototyping with variables 😬
But once you master it you start to realize something...
It follows the same repeatable steps 👇
My goal with figma.academy is to simplify prototyping with variables as much as I possibly can...
So here's how I break it down into 4 repeatable steps 👇
01 // Create the variable you need
Start by asking yourself "What piece of UI do I want to change in my prototype?"
You'll need a variable for that 💡
Here's how you pick the right variable type for the job 👇
01 //
Which type you choose depends on what you're trying to accomplish 👇
🔤 Are you updating text?
⤷ string/number
🧱 Are you updating components?
⤷ string/boolean
👀 Are you changing visibility?
⤷ boolean
🎨 Are you updating styling?
⤷ color/number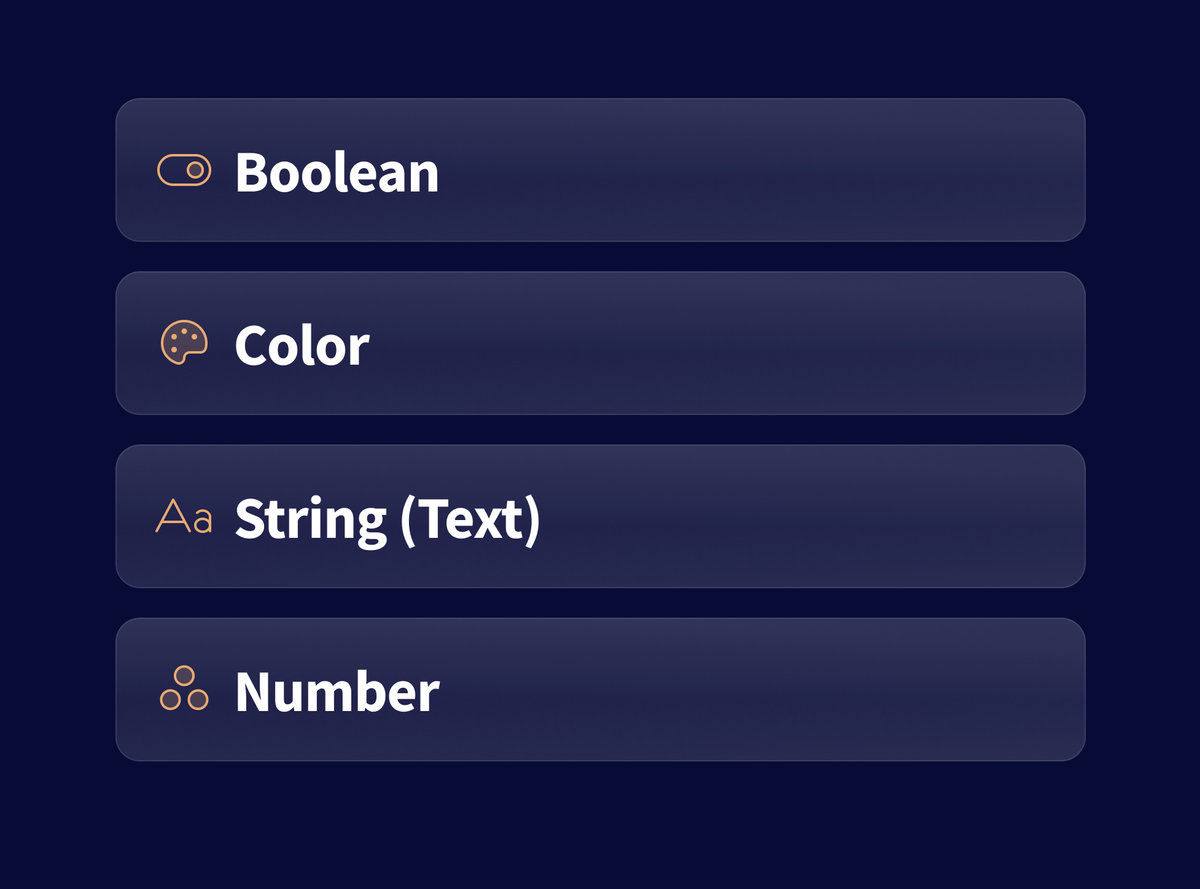
01 //
Once you have the variables created, use that first column to define your DEFAULT value.
Note: if you're using string variables to control component states then you're going to want to write the name of your starting variant exactly as it appears 👀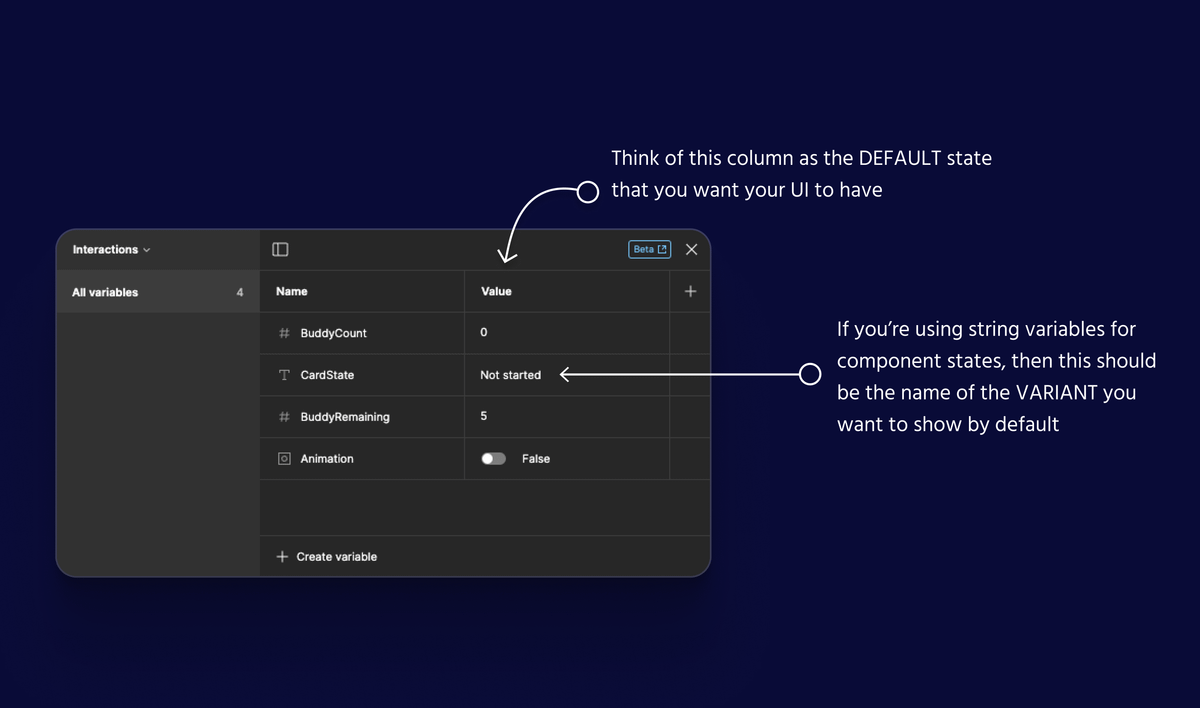
02 // Assign your variable to your UI
You're going to hear the word "bind" a lot... all that means is that you're mapping a variable to a piece of UI
You'll always bind variables in the relevant section of the properties panel 👀
03 // Test your connection
Before jumping into prototyping mode I like to run a test to make sure things are behaving the way I expect.
Open up your local variables and make a change to the default value...
Did it update your UI? If yes, then you're ready for step 4 👇
04 // Set up your triggers
This is where it starts to get fun 🤩
There's WAY too much for a thread. I have a whole module of videos in figma.academy on this topic...
But I do want to leave you with one idea that hopefully simplifies this whole feature set for you 👇
04 //
Every variable-powered prototype you make will end with a `Set Variable` interaction.
That's ultimately the goal... to use variables to trigger a change in your UI by updating the variable you've assigned.
Here's the question you have to ask yourself though 👇
04 //
"Do I have to first see if a separate condition is met before I can change this UI?" 🤔
If no ☞ `Set Variable`
If yes ☞ Add a `Conditional` first and THEN nest your `Set Variable`
Thinking of `Conditional` as a wrapper for `Set Variable` was a huge unlock for me 👇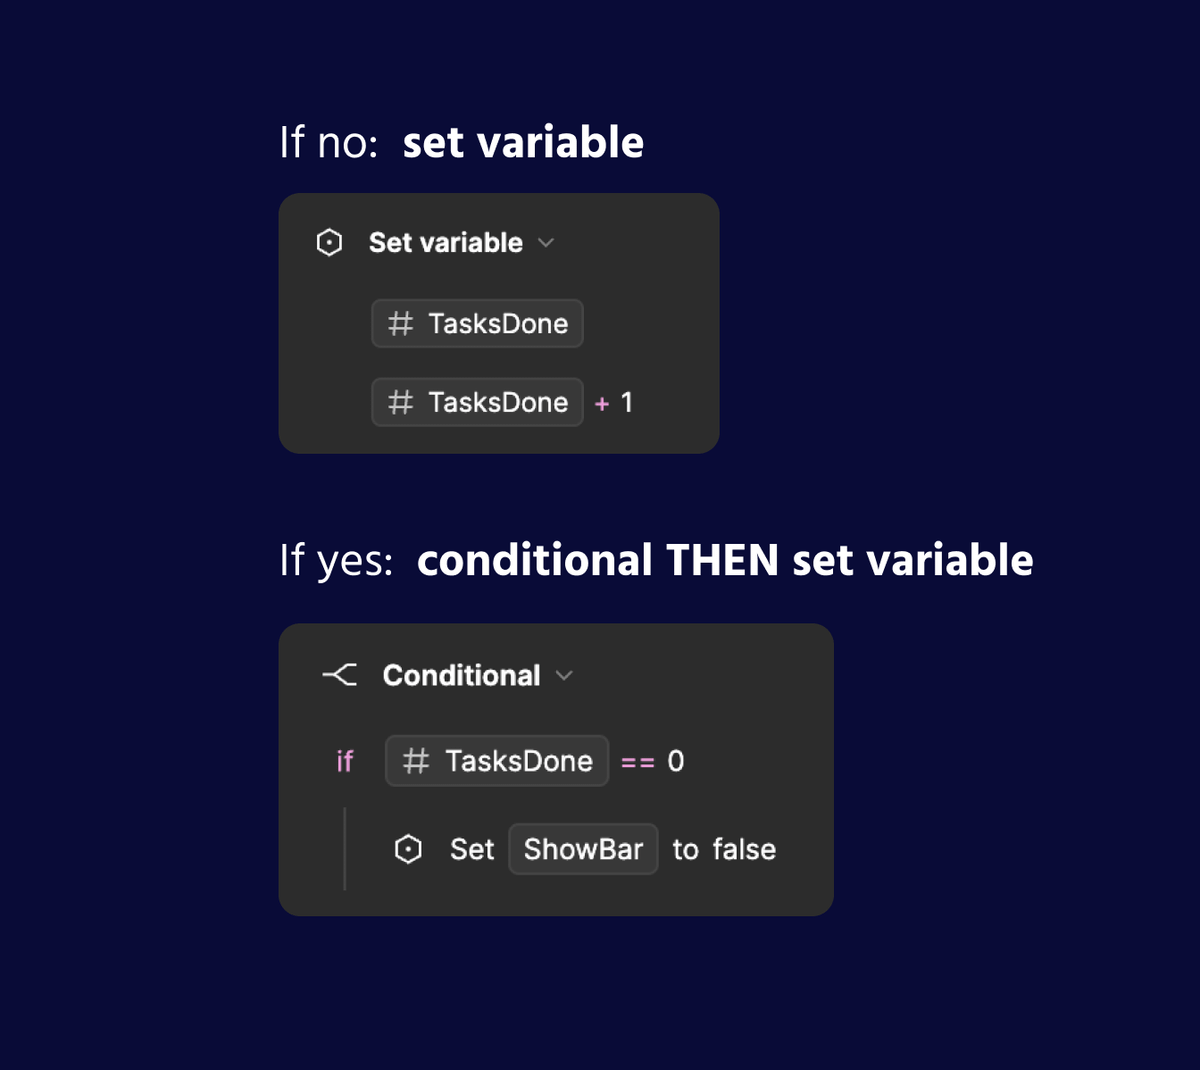
You can also go way deeper here 👇
twitter.com/ridd_design/status/1711373871155396950?s=20
Before you go...
You're going to want to add variables to ALL of your prototypes...
Don't do that 😬
Variables are great when used strategically but they can also add a lot of unnecessary complexity too
You'll have to follow @ridd_design for a future thread on that though :)

Ridd 🤿
@ridd_design
Teaching 5,000+ advanced Figma ☞ figma.academy Learning from top designers ☞ dive.club Founding designer ☞ maven.com