6 Linux bash/zsh history shortcuts that will save you time (every Linux user should know this):
Using bash/zsh history effectively will save you a significant amount of time in the Linux terminal.
This will not only save you time, but it will also make your life much easier when using the LinuxtTerminal to perform day-to-day tasks as a regular user,developer or sysadmin.
Here are 6 Linux bash/zsh history shortcuts that will save you time:
1. Viewing the history
The history bash built-in command is the simplest way to see commands you've used previously.
$ history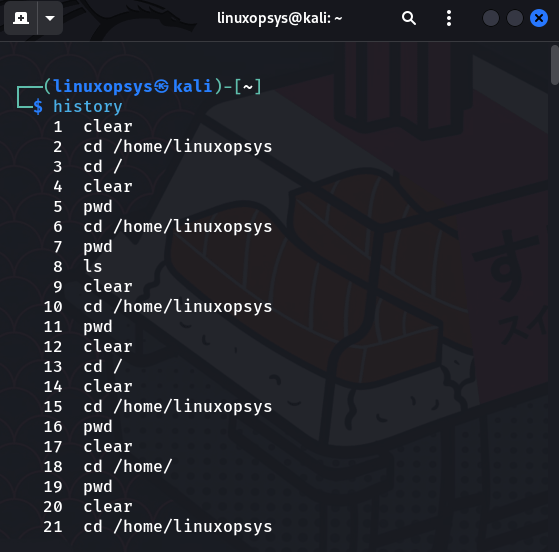
This command will display a list of a hundred or thousand commands stored in your history. The size is determined by the $HISTSIZE variable, which can be easily changed if desired.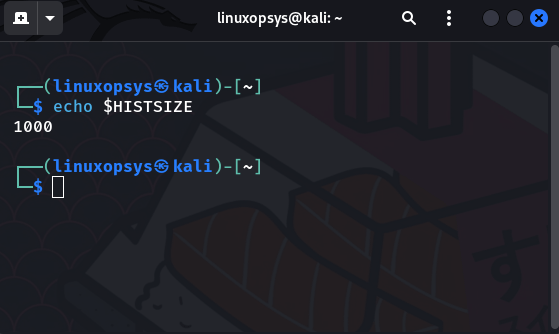
Simply assign a new value to the variable to change the size, for example, changing the history size to 500 lines run the following command:
$ HISTSIZE=500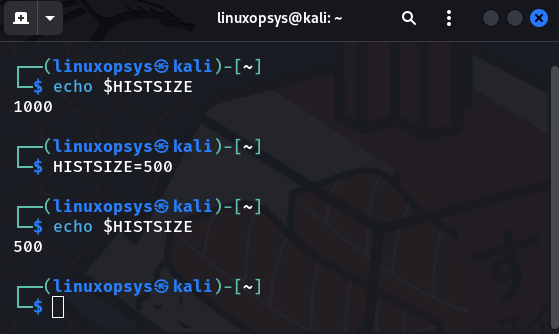
If you don't want your screen to be cluttered when viewing your history, you can limit the number of lines to display by using the history command with a numeric argument, where the value is the number of lines to display.
For instance, to display only the last six commands from the history:
$ history 6
This only works in bash; I couldn't find a way to do it in zsh using history options or arguments. Please let me know in the comments if you have.
but you can combine the history command with tail as a workaround:
$ history | tail -n 6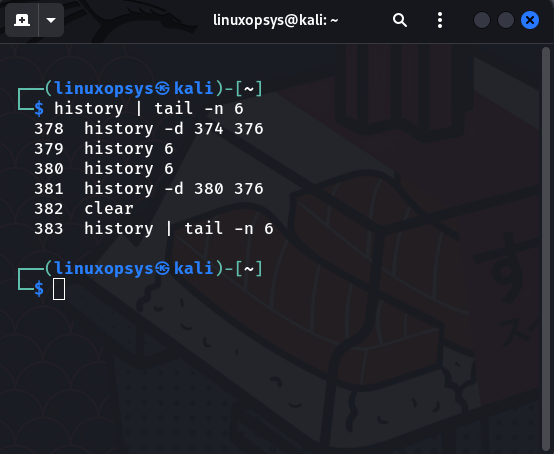
2. Searching commands from history:
There are two or more methods for searching through the bash history. Personally, I prefer to use the history command in conjunction with the grep command or a convenient shortcut to perform a reverse search through the history.
- Using grep
To search a command from history using grep, run the history command and pipe the output to the command, then specify an expression to search for as a grep option.
$ history | grep "alias"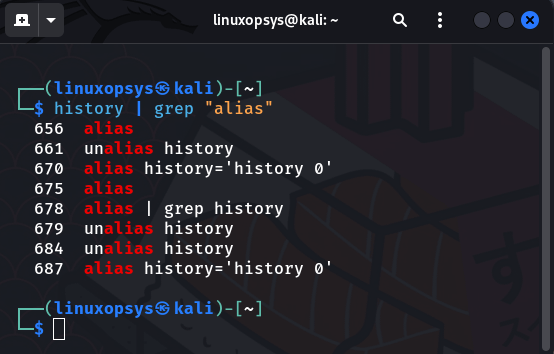
- Using CTRL + R shortcut
A better and more convenient way to search through history is to use the CTRL + R shortcut key to initiate a reverse search and then type the string you're looking for.
This is a convenient method because it allows us to execute the command once you find it, as opposed to grep, which requires us to retype the command.
For example, searching the 'alias' command: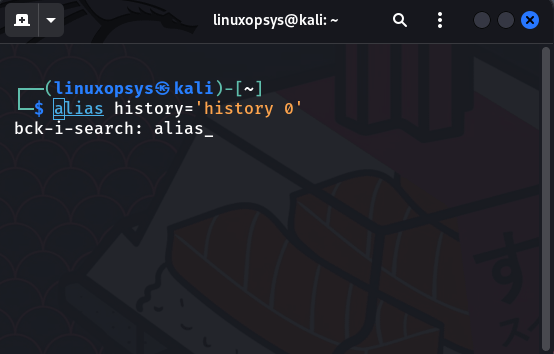
You can cycle through the options by pressing CTRL + R repeatedly, and once you find the command you want, press CTRL + O or simply the 'enter' key to select and run it. Simply press ESC or CTRL + G to exit the reverse search.
3. Quickly executing commands from history:
Another useful feature of bash/zsh is the ability to run commands from the history using the ! command. That is, you can execute a command by typing !#, where # is the command's position/number in the history.
# can have either a negative or positive value.
$ !364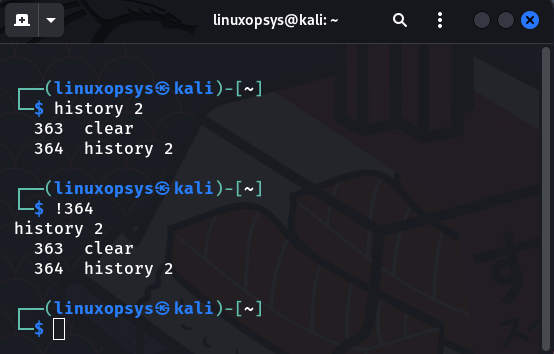
You can rerun the previous command by using '!!' or '!-1'. This is useful when you forget to run a command with sudo privileges.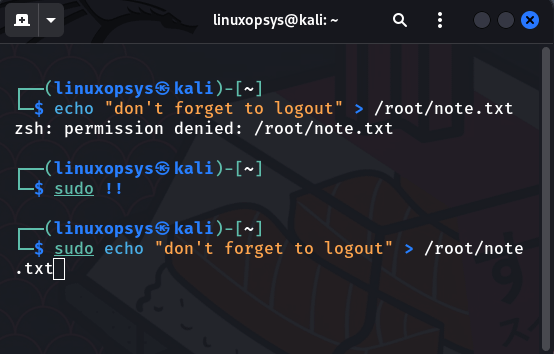
You can also run the last command that begins with a specific text, such as this: ! text
Assume you ran echo command before and want to run it again. You can put it to use as follows:
$ !echo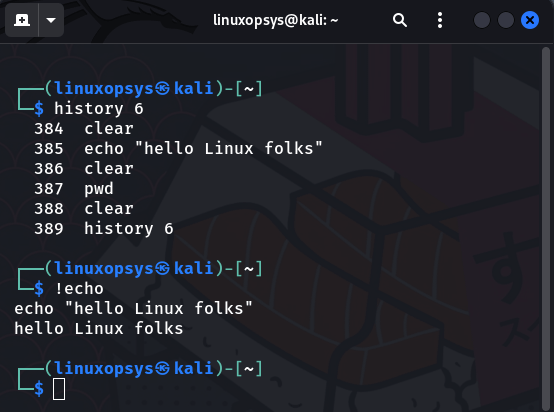
If you have any doubts about a command, rather than running it straight away, print it by appending ':p' to the end of it. So you use it like '!echo:p', '!23:p', and so on.
There is no need to do this if you are using ZSH, as it will display the command before executing it: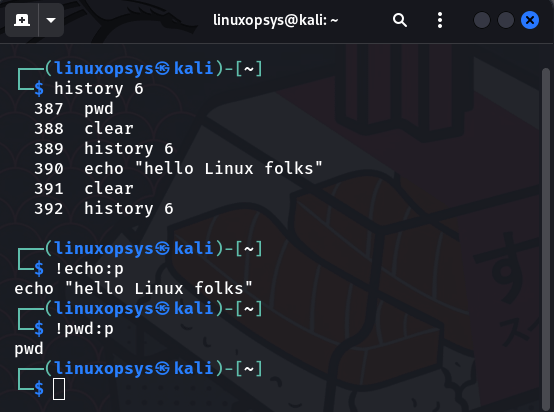
4. Correcting typos or mistakes on previous commands:
You can use the ^foor^bar command to edit the command you ran previously and execute it again.
$ sodu mkdir demo
$ ^sodu^sudo
This will replace "sodu" with "sudo" and re-rerun the command.
This is very handy if you want to correct typos or mistakes on long commands.
5. Reuse arguments from previous commands in your history
Another fantastic history shortcut is to use!$ and!*, which will substitute/place the last argument and arguments of the last command into your line, respectively.
Assume you were reading a file with the cat command and decided you needed to edit it with vim or another editor of your choice. You use the '!$' shortcut instead of typing the entire file name.
The above option gives you only the last argument of the previous command. If you want all the arguments, use this the *!
6. Clearing your history
If you feel there are too many commands and you no longer want them, or if you don't want people or other users to know the commands you've been using throughout your session for security reasons, you can simply clear with the option '-c' or -d.
The -c option clears your current history and starts adding commands from scratch, while the -d option deletes the specified command. The -d option only works with BASH, not ZSH.
$ history -c $history -d 380 376
That's it! Thank you for making it this far. Hopefully, you'll find this thread useful. Any additions are welcome.
Check us out @linuxopsys if you liked this thread!! We gonna be tweeting more about Linux, sysadmin and devops.

Linuxopsys
@linuxopsys
Learn something new daily from our daily infographic tweets. What to expect to learn from us: Linux🐧, Sysadmin💻, and DevOps.